
티스토리 뷰
(Raspbian)[Raspberry Pi] EMP([E]nginx + MariaDB + PHP ) 설치
jinozpersona 2019. 11. 2. 22:19INTRO
nginx와 php 설치 후 다음 포스트에서 MariaDB를 설치하고 접속 및 간단한 사용법을 알아본다.
apt-get(Advanced Packaging Tool) update/upgrade
$ sudo apt-get update
$ sudo apt-get dist-upgrade
1. nginx 설치 및 확인
$ sudo apt-get install nginx
$ sudo service nginx start

## nginx start 동일 명령어
$ sudo service nginx start
$ sudo systemctl start nginx
$ sudo /etc/init.d/nginx start
Browser에 라즈베리파이 ip 주소를 입력하면 다음 화면을 확인 할 수 있다.
[참고] 제거방법 및 제거 확인
$ dpkg -l | grep nginx

$ sudo apt-get purge nginx-full nginx-common

$ dpkg -l | grep nginx
2. PHP 설치
$ sudo apt-get install php-fpm
nginx에서 PHP 활성화하기
default server configuration 수정
- index.php 추가
- 기본사항 # 제거 및 php7.X-fpm.sock 수정 -> 수정 후 필요한 코드는 다음과 같다.
location ~ \.php$ {
include snippets/fastcgi-php.conf;
fastcgi_pass unix:/run/php/php7.3-fpm.sock;
}
$ sudo nano /etc/nginx/sites-enabled/default

--nanoEditor
....

        # Add index.php to the list if you are using PHP
        index index.php index.html index.htm index.nginx-debian.html;

....

        # pass PHP scripts to FastCGI server
        #
        location ~ \.php$ {
                include snippets/fastcgi-php.conf;
        #
        #       # With php-fpm (or other unix sockets):
                fastcgi_pass unix:/run/php/php7.3-fpm.sock;
        #       # With php-cgi (or other tcp sockets):
        #       fastcgi_pass 127.0.0.1:9000;
		}
....
- nginx 재시동
##심볼릭링크 sudo ln -s [원본] [대상(링크)]
$ sudo ln -s /etc/nginx/sites-available/default /etc/nginx/sites-enabled/default

$ sudo /etc/init.d/nginx reload
PHP Test : nginx welcome message를 index.php로 저장 후 php 코드 추가
$ cd /var/www/html

$ ls -al

drwxr-xr-x 2 root root 4096 Nov  2 23:10 .
drwxr-xr-x 3 root root 4096 Nov  2 23:10 ..
-rw-r--r-- 1 root root  612 Nov  2 23:10 index.nginx-debian.html

$ sudo mv index.nginx-debian.html index.php

$ ls -al
drwxr-xr-x 2 root root 4096 Nov 13 14:26 .
drwxr-xr-x 3 root root 4096 Nov  2 23:10 ..
-rw-r--r-- 1 root root  612 Nov  2 23:10 index.php
- 최상단에 php 코드 추가
$ sudo nano index.php

--nanoEditor
<?php echo phpinfo(); ?>
<!DOCTYPE html>
<html>
<head>
<title>Welcome to nginx!</title>
<style>
    body {
        width: 35em;
        margin: 0 auto;
        font-family: Tahoma, Verdana, Arial, sans-serif;
    }
</style>
</head>
<body>
<h1>Welcome to nginx!</h1>
<p>If you see this page, the nginx web server is successfully installed and
working. Further configuration is required.</p>

<p>For online documentation and support please refer to
<a href="http://nginx.org/">nginx.org</a>.<br/>
Commercial support is available at
<a href="http://nginx.com/">nginx.com</a>.</p>

<p><em>Thank you for using nginx.</em></p>
</body>
</html>
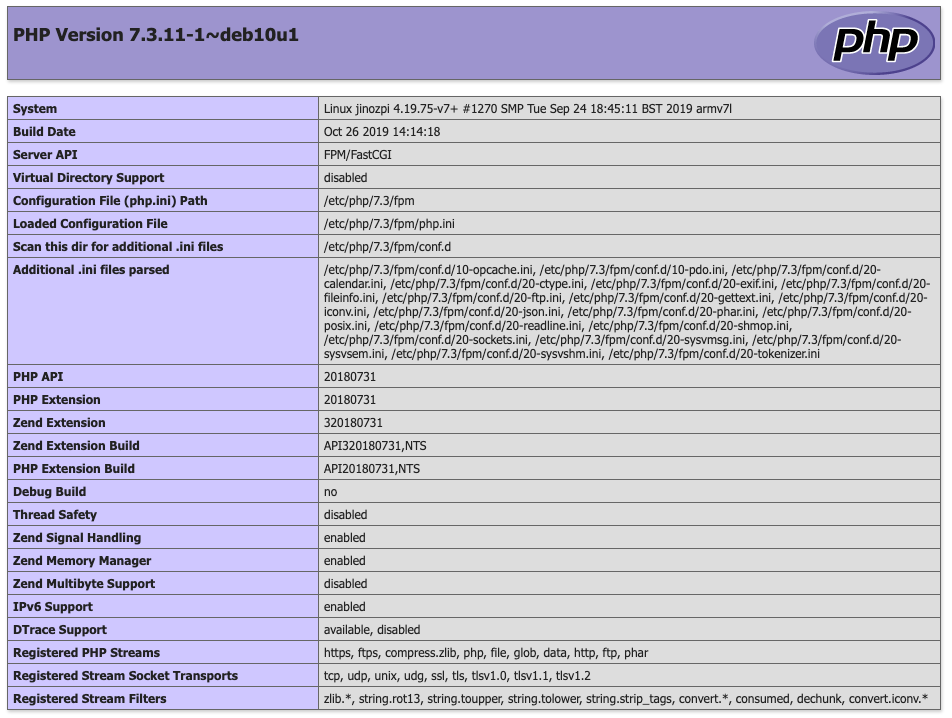
index.php 수정 후 browser 새로 고침하면 다음 화면이 나타나고 스크롤을 끝까지 내리면 nginx welcome message도 확인할 수 있다.
3. MariaDB 설치
- apt-get upgrade & update
$ sudo apt-get update
$ sudo apt-get dist-upgrade
- mariadb-server 설치 및 virsion 확인
$ apt-cache search mariadb-server

auth2db - Powerful and eye-candy IDS logger, log viewer and alert generator
mariadb-server - MariaDB database server (metapackage depending on the latest version)
mariadb-server-10.0 - MariaDB database server binaries
mariadb-server-10.3 - MariaDB database server binaries
mariadb-server-core-10.0 - MariaDB database core server files
mariadb-server-core-10.3 - MariaDB database core server files

$ sudo apt-get install mariadb-server

....


$ mysql -V
mysql  Ver 15.1 Distrib 10.3.17-MariaDB, for debian-linux-gnueabihf (armv7l) using readline 5.2
DB 접속하기 및 root 계정 설정
- mariaDB(mysql) 접속 및 간단한 명령어
$ sudo mysql -u root
Welcome to the MariaDB monitor.  Commands end with ; or \g.
Your MariaDB connection id is 51
Server version: 10.3.17-MariaDB-0+deb10u1 Raspbian 10

Copyright (c) 2000, 2018, Oracle, MariaDB Corporation Ab and others.

Type 'help;' or '\h' for help. Type '\c' to clear the current input statement.

MariaDB [(none)]> show databases;
+--------------------+
| Database           |
+--------------------+
| information_schema |
| mysql              |
| performance_schema |
+--------------------+
3 rows in set (0.001 sec)

MariaDB [(none)]> use mysql
Reading table information for completion of table and column names
You can turn off this feature to get a quicker startup with -A

Database changed
MariaDB [mysql]> show tables;
+---------------------------+
| Tables_in_mysql           |
+---------------------------+
| column_stats              |
| columns_priv              |
| db                        |
....
| user                      |
+---------------------------+
- root 계정 설정
MariaDB [mysql]> update user set password=password('your_pass') where user='root';

MariaDB [mysql]> flush privileges;
- Table 구성 및 내용 확인 방법
MariaDB [mysql]> describe user;
+------------------------+-----------------------------------+------+-----+----------+-------+
| Field                  | Type                              | Null | Key | Default  | Extra |
+------------------------+-----------------------------------+------+-----+----------+-------+
| Host                   | char(60)                          | NO   | PRI |          |       |
| User                   | char(80)                          | NO   | PRI |          |       |

...

MariaDB [mysql]> select * from user;
- DB 접속 종료
MariaDB [mysql]> exit
참고문헌
'Raspberry Pi > Web-Server' 카테고리의 다른 글
| (Raspbian)[Raspberry Pi] Nginx-unix socket-uWSGI-django 연결 (0) | 2019.12.09 |
|---|---|
| (Raspbian)[Raspberry Pi] django MariaDB 연동 (0) | 2019.12.02 |
| (macOS)[mysql] django local mysqlDB 연동 (0) | 2019.11.27 |
- Total
- Today
- Yesterday
- Django
- server
- raspberrypi
- ERP
- arduino
- Pandas
- DAQ
- Regression
- sublime text
- CSV
- COVID-19
- r
- Raspberry Pi
- template
- Templates
- pyserial
- Model
- 라즈베리파이
- 코로나19
- 확진
- Python
- MacOS
- analysis
- 코로나
- github
- vscode
- DS18B20
- 자가격리
- git
- SSH
| 일 | 월 | 화 | 수 | 목 | 금 | 토 |
|---|---|---|---|---|---|---|
| 1 | 2 | 3 | ||||
| 4 | 5 | 6 | 7 | 8 | 9 | 10 |
| 11 | 12 | 13 | 14 | 15 | 16 | 17 |
| 18 | 19 | 20 | 21 | 22 | 23 | 24 |
| 25 | 26 | 27 | 28 | 29 | 30 | 31 |