
티스토리 뷰
(Raspbian)[RaspberryPi][django] project 뼈대만들기
jinozpersona 2019. 12. 11. 16:38INTRO
python 언어를 접하면서 처음 시도했던 건 django를 이용한 runserver 구동 및 Heroku(Platform as a Service) 배포를 시작했다. 처음 django를 접하는 분들은 python/django 카테고리의 포스트를 참고하여 시작하길 바란다.
다음으로 욕심내었던 건 Raspberry Pi에 web-server를 띄워 Blog를 구동하는 것이었다. server는 준비되었으니 Blog 만들기를 시작해보려고 한다. Raspberry Pi에 Raspbian OS를 설치하고 nginx-uwsgi-django로 web-server를 구성을 시작해보려면 Raspberry Pi/Raspbian과 Raspberry Pi/Web-Server 카테고리의 포스트를 참고하길 바란다.
python/django는 초기 입문, Raspberry Pi/Blog_django는 확장 개념으로 이해하면 좋을 것 같다.
Raspberry Pi에서 django-project가 작동된다는 가정하에 다음을 이어가려고 한다.(참고 : https://jinozblog.tistory.com/29)
1. django superuser 등록 및 post app 설치/설정
(jbe)$ ./manage.py createsuperuser
(jbe)$ ./manage.py startapp post
- post app settings.py의 INSTALLED_APPS에 등록
- post/models.py
from django.conf import settings
from django.db import models


class Post(models.Model):
    author = models.ForeignKey(settings.AUTH_USER_MODEL, on_delete=models.CASCADE, null=True)
    title = models.CharField(max_length=128)
    content = models.CharField(max_length=2048)
    created_at = models.DateTimeField(auto_now_add=True)
    updated_at = models.DateTimeField(auto_now=True)

    def __str__(self):
        return self.title
- post/admin.py
from django.contrib import admin
from post.models import Post

# Register your models here.
admin.site.register(Post)
(jbe)$ ./manage.py makemigrations post
(jbe)$ ./manage.py migrate
MariaDB 확인 : post 16개 작성 후 count 함수를 통해 post 수량 확인 가능
MariaDB [(none)]> use YourDB;
MariaDB [YourDB]> show tables;
+----------------------------+
| Tables_in_YourDB           |
+----------------------------+
| auth_group                 |
| auth_group_permissions     |
| auth_permission            |
| auth_user                  |
| auth_user_groups           |
| auth_user_user_permissions |
| django_admin_log           |
| django_content_type        |
| django_migrations          |
| django_session             |
| post_post                  |
+----------------------------+

MariaDB [YourDB]> desc post_post;
+------------+---------------+------+-----+---------+----------------+
| Field      | Type          | Null | Key | Default | Extra          |
+------------+---------------+------+-----+---------+----------------+
| id         | int(11)       | NO   | PRI | NULL    | auto_increment |
| title      | varchar(128)  | NO   |     | NULL    |                |
| content    | varchar(2048) | NO   |     | NULL    |                |
| created_at | datetime(6)   | NO   |     | NULL    |                |
| updated_at | datetime(6)   | NO   |     | NULL    |                |
| author_id  | int(11)       | YES  | MUL | NULL    |                |
+------------+---------------+------+-----+---------+----------------+

MariaDB [YourDB]> select count(*) as cnt from post_post;
+-----+
| cnt |
+-----+
|  16 |
+-----+
2. post_list, post_detail 구현하기
- post/views.py
from django.shortcuts import render
from post.models import Post

# Create your views here.
def post_list(request):
    posts = Post.objects.all()
    context = {'posts':posts}
    return render(request, 'post_list.html', context)

def post_detail(request, pk):
    post = Post.objects.get(pk=pk)
    context = {'post':post}
    return render(request, 'post_detail.html', context)
- django_project/urls.py
from django.contrib import admin
from django.urls import path
from post.views import post_list, post_detail

urlpatterns = [
    path('admin/', admin.site.urls),
    path('', post_list, name='post_list'),
    path('post/<int:pk>/', post_detail, name='post_detail'),
]
- post/templates 생성 및 post_list, post_detail 생성/수정
(jbe)[[django_project]]$ mkdir ./post/templates
(jbe)[[django_project]]$ nano ./post/templates/post_list.html
<!DOCTYPE html>
<html>
 <head>
  <title>post_list</title>
 </head>

 <body>
  <h2> ~~~~~~~~~~~~~~~~~~~~~~~~~~~~~~~~~~~~~~~~~~ </h2>
  <h1> Welcome To jinozblog served by RaspberryPi </h1>
  <h2> ~~~~~~~~~~~~~~~~~~~~~~~~~~~~~~~~~~~~~~~~~~ </h2>

  <div>
   {% for post in posts %}
   <h2>post제목 : <a href="post/{{ post.pk }}">{{ post.title }}</a></h2>
   <h4>post작성자/발행일 : {{ post.author }} / {{ post.created_at }}</h4>
   <h5>-------------------------------------</h5>
   {% endfor %}
  </div>
 </body>
</html>(jbe)[[django_project]]$ nano ./post/templates/post_detail.html
<!DOCTYPE html>
<html>
 <head>
  <title>post_detail</title>
 </head>

 <body>
  <h2> ~~~~~~~~~~~~~~~~~~~~~~~~~~~~~~~~~~~~~~~~~~ </h2>
  <h1> Welcome To jinozblog served by RaspberryPi </h1>
  <h2> ~~~~~~~~~~~~~~~~~~~~~~~~~~~~~~~~~~~~~~~~~~ </h2>

  <div>
   <h2>{{ post.title }}</a></h2>
   <h4>{{ post.author }} / {{ post.created_at }}</h4>
   <h3>{{ post.content }}</h3>
   <h5>-------------------------------------</h5>
  </div>
 </body>
</html>
- post/templates 경로 추가 : django_project/settings.py
import os

# Build paths inside the project like this: os.path.join(BASE_DIR, ...)
BASE_DIR = os.path.dirname(os.path.dirname(os.path.abspath(__file__)))
TEMPLATES_DIR = os.path.join(BASE_DIR, 'templates')

....

TEMPLATES = [
    {
        'BACKEND': 'django.template.backends.django.DjangoTemplates',
        'DIRS': [
                 TEMPLATES_DIR,
                 ],
        'APP_DIRS': True,
        ....
    }
]
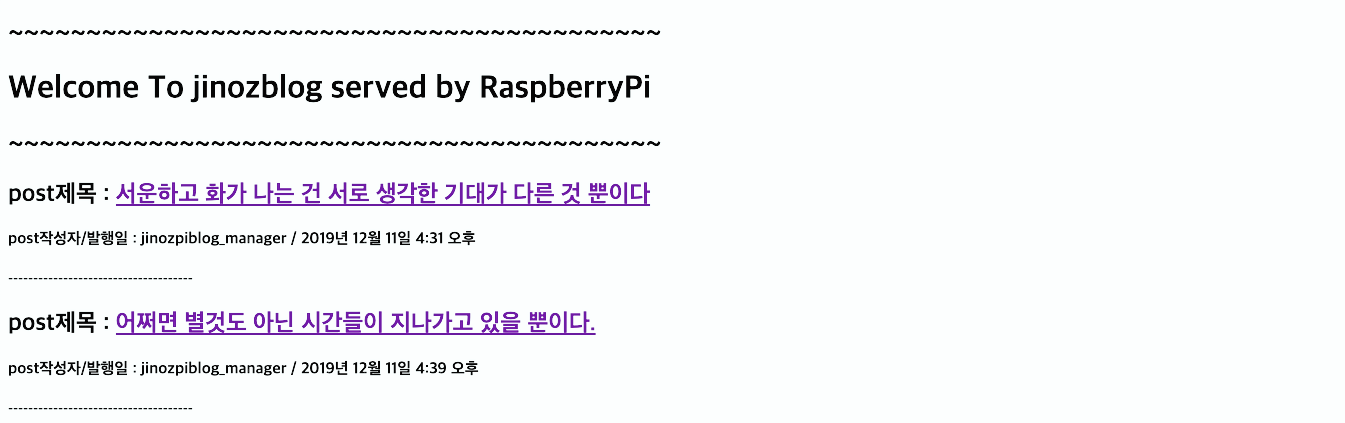
browser 주소창 공인IP:PORT.No. : 접속 후 메인화면
제목 클릭 후 이동된 post_detail

'Raspberry Pi > Webapp_django' 카테고리의 다른 글
| (Raspbian)[RaspberryPi][django] project Deploy 사전준비 (0) | 2019.12.13 |
|---|
- Total
- Today
- Yesterday
- pyserial
- github
- raspberrypi
- MacOS
- Regression
- Django
- server
- Raspberry Pi
- Python
- ERP
- arduino
- vscode
- 자가격리
- git
- Templates
- 라즈베리파이
- analysis
- 코로나
- template
- DS18B20
- Pandas
- CSV
- r
- 코로나19
- 확진
- sublime text
- Model
- DAQ
- COVID-19
- SSH
| 일 | 월 | 화 | 수 | 목 | 금 | 토 |
|---|---|---|---|---|---|---|
| 1 | ||||||
| 2 | 3 | 4 | 5 | 6 | 7 | 8 |
| 9 | 10 | 11 | 12 | 13 | 14 | 15 |
| 16 | 17 | 18 | 19 | 20 | 21 | 22 |
| 23 | 24 | 25 | 26 | 27 | 28 | 29 |
| 30 | 31 |